Paperclips…colored pencils…erasers…coins. What a jumble! Recycle plastic containers into an organizer that brightens up your desk!
1.
Gather up recycled items to put together a neat desk storage unit. To make one like the picture, you’ll need a cardboard roll, recycled plastic containers, and a tall tissue box for the center pillar. Cut the cardboard roll into two or three different lengths with Crayola® Scissors.
2.
Choose a cool theme or color scheme. Decorate enough paper with Crayola Gel Markers to cover the tissue box and cardboard rolls. Glue the paper on with Crayola School Glue. Arrange the decorated pieces and recycled plastic containers however you choose. Glue everything together.
3.
While the glue dries, construct a base for your organizer with Crayola Model Magic. Blend color from a Washable Gel Marker into white Model Magic to create colors that complement your containers. Flatten the Model Magic to fit under and beyond the edges of your organizer. Press pieces of Model Magic on the damp base to make a raised (relief) design. Glue the storage unit to the base. Cut a colorful construction paper doily to go under everything. Glue it to the base. Air-dry your organizer overnight.
4.
Fill cups with small items. Use the rolls for markers and pens. When the tissues are gone, store scissors, rulers, or other tall things inside.
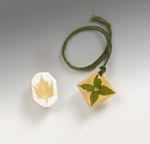
Create unique gold jewelry with nature's finest leaves. Add Crayola® Model Magic® and gold Premier Tempera for a strikin