Make a paper template of your body to pose in different actions, then trace it for an action scene.
1.
Draw your figure on oak tag. Use Crayola® Scissors to cut apart your completed figure at shoulder, elbow, waist, head, leg joint at hip, and knee. Keep pieces (which will be used over time) in an envelope with your name on it.
2.
Use small masking tape pieces to reattach body segments in a position that indicates a beginning action of your activity's sequence. Tape the figure down on white paper with more small masking tape pieces, trace around it with a Crayola Erasable Colored Pencil, then remove it.
3.
Reposition the figure in a more advanced position in the action sequence, and trace it again. Repeat to create 3-7 figures which represent a complete action sequence. Add outlines of clothes and accessories, or create these separately.
4.
Use markers to apply colored patterns to the figures which emphasize their actions. Cut out these figures after patterns have been added.
5.
Apply tempera paint to a large background paper in patterns which indicate the paths of movement your activity requires. Choose colors that will enhance the figures. Paint can be applied with brushes, sponges and other atypical tools. Allow paint to dry.
6.
Use Crayola School Glue to apply the figures to the backgrounds.
Stick up for sharp-toothed creatures who get a bad rap! They are just trying to survive like all other animals.
What’s at the center of a galaxy? A black hole! Look WAY beyond a black hole by creating a vivid galaxy and observation
Play a fast-paced game that is popular in the Spanish countryside. Paint your own action-filled fun on your playground!
Tissue paper flowers burst out of a chalk-designed two-dimensional vase to create a flowering plant display fit for givi
See flower parts through the eyes of a famous artist! Georgia O'Keeffe's florals are a young botanists' dream.
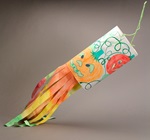
Catch indoor breezes with a colorful windsock! Whether you’re learning about Japan, weather, or aviation, Crayola® Twist
Bring nature's designs indoors with these golden leaf-printed bookmarks. For gifts, make matching picture frames, gift w
Ready to be a fearless explorer? Create a spaceship flying among strange new planets, where stars have no limit!