Whales are immensely fascinating creatures. Discover how they look when they come to the water’s surface and then dive deep! This science project will be sure to make a splash!
1.
Research information about whales. In which oceans do these marine mammals live? Where do they migrate? How many species are there? Compare and contrast the species, including different types of spouts from their blowholes. Note how graceful they look when they come to the surface and then dive back into the water. Find out how global warming is changing whale habitats. What other factors threaten whales?
2.
Imagine you are on a whale-watching adventure. Choose a place on the globe, find out what kinds of whales you are likely to see, and then accurately portray one type of whale in its natural habitat in a sculpture. A paper plate is the perfect surface for making this science project.
3.
Start by representing the landscape where your chosen whale lives. Are there glaciers? Are mountains covered with glistening ice and snow? Or are there icebergs near a ship in the open sea? Here are some ideas to get you started.
4.
To make a realistic-looking glacier, press Crayola Air-Dry Clay flat with your hand. Leave the edges rough. Make a few jagged pieces of mountains for the background. Press glacier pieces on top of the mountains. To add texture to the glaciers, press crumpled aluminum foil into the clay to create crevices.
5.
At the base of your sculpture, press your thumb where the water will be. Make lots of indentations to create a rippled effect.
6.
Make the whale’s tail by rolling two small balls of clay. Pinch and flatten them into ovals. With your thumb and forefinger, pinch the ends to look like a tail. Press the two pieces together to form a diving whale. To make the whale look as if it’s diving
7.
Add more details if you wish, such as trees in the forest, the name of the place you visited, or a boat drifting in the background. Use modeling tools to add interesting texture.
8.
Air-Dry Clay can be painted when wet or dry. Paint your sculpture with Crayola Washable Watercolors or Tempera—right on the paper plate where you sculpted. Remember to rinse your brushes when you change colors. For deep hues, apply several coats because t
9.
To add sparkle to the sea or sheen to glaciers, brush on Crayola Pearl-It! or Glitter-It! Tempera Mixing Medium. Air-dry your whale adventure for at least 3 days before you exhibit it.
10.
Orally present information about your whale to your classmates. Be sure to include information about that species’ current status.
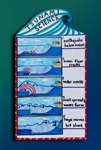
Tsunamis, or gigantic waves, are one of the most destructive natural disasters. Discover how they’re formed, deep under