Create an aluminum foil printing plate then design a collage with your printed papers.
1.
Find out what prints are, and how they differ from original art. Why do artists produce prints? What materials can be used as printing plates? List uses of prints in everyday life (newspapers, wallpaper, fabric, books, posters, photographs). Imagine what life would be like if the printmaking process had not yet been invented.
2.
<b><i>To make printed papers</b></i>, select a regular sheet of white drawing paper. With Crayola® Scissors, cut a piece of aluminum foil about a finger's length larger than the paper all the way around. Crumple the foil, then open and flatten it, leaving wrinkles on the surface.
3.
Cover a flat work surface with newspaper. With Crayola Tempera Paint and large Crayola Paint Brushes, paint and mix colors on the surface of the foil.
4.
Dip the drawing paper into water, or wet it with a clean brush. Lay the damp paper on the painted foil. Roll a rubber brayer or foam roller over the paper. Pull the print away from the foil to see the "veins" produced by the wrinkles. Repeat the process. Lay wet paper flat to dry.
5.
Select a project in which to use the printed papers, such as these:<br><li>Alternate prints with solid-colored paper to make a patchwork quilt design. <li>Use prints as backgrounds for topographic maps, fantasy or outer space scenes, or dioramas. Add fig
6.
<b><i>To make a mat for a photo with the printing plate</b></i>, wipe the painted aluminum foil with a damp paper towel to reveal shiny surfaces on the high ridges. Dry on a flat surface.
7.
Choose a favorite photograph. Cut a rectangle that is 3 or 4 inches (8 to 10 cm) larger than the photo from a recycled cereal box or other cardboard. Choose a standard frame size, such as 8 by 10 inches if a frame is available.
8.
Spread Crayola School Glue evenly on the cardboard. Place the unpainted back of the foil on the glued surface and smooth. Turn the cardboard over. Smooth down the foil edges and glue. Trim away any ragged edges and excess foil on the corners.
9.
Spread glue evenly on the back of the photo. Press it in the center of the painted foil. Prevent warping by placing a heavy book on top of the picture and frame until the glue dries. Glue a paper clip to the back for hanging.
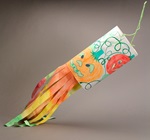
Catch indoor breezes with a colorful windsock! Whether you’re learning about Japan, weather, or aviation, Crayola® Twist
Ready to be a fearless explorer? Create a spaceship flying among strange new planets, where stars have no limit!
Explore growth cycles through the seasons then create original chalk drawings of pumpkins ready for harvest.
Let your creativity soar as you build a hot-air balloon replica.
What high-tech invention is most intriguing? What scientific discovery is truly amazing? Build a replica and discover th
To the rescue on land or sea! Put out the fire! Deliver heavy cargo! Design a 3-D model helicopter and discover how they
Who are the people who keep us healthy and safe? Kids learn more about rescue and medical careers by showing these careg
People around the world give thanks for their food. Celebrate a harvest of pineapples, pumpkins, or pomegranates-and sho