Stop using the same old lines! Mix up your lines with these texture techniques used by the master, Leonardo Da Vinci.
1.
Texture is an element of art that describes the physical surface quality of an object. We can feel textures by touching an object. Artists can visually portray textures using lines to imply the way something feels in real life—hairy, rough, sharp, silky, etc.
2.
There are several ways to use lines to show textures. Use the broad side of the drawing tool to make shaded areas of light and dark. This can be used to make a smooth texture. Hatching is drawing evenly spaced lines in the same direction. Cross-hatching is a technique that crosses lines in the opposite direction of the hatched lines. Stippling uses dots instead of lines. What textures can you show with each of these techniques?
3.
Explore the sketches and line drawings of Leonardo Da Vinci. Can you identify each of the techniques listed above in his drawings? What textures does he create using these lines?
4.
On black construction paper, draw lines with Crayola Color Sticks to create different textures. Experiment with every side, point, and angle of the Color Sticks! Try shading, hatching, cross-hatching, and stippling. Use a different color for each technique to make your lines stand out! What interesting compositions can you make with these techniques?
Travel ancient trade routes! What products were exchanged? Where were the major ports? How did traders cross land? Show
What do you get when you combine Crayola® Dry-Erase Crayons and a plastic box frame? Hours of simple fun and learning!
Create an intricate stained glass pattern. On tracing paper, translucent marker colors seem to glow in sunlight.
Celebrate the Ch'ing Ming Festival, or any festive holiday, with these Tiny Chinese Kites!
What symbols or logos would you use to represent the three branches of the U.S. government? Mark important passages in y
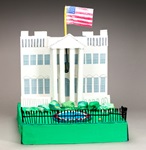
Create a replica of the U.S. White House! Learn about the building's history, architecture, and its famous occupant's ro
Track how Edison's inventions changed everyday life. Imagine a world without lightbulbs or sound recordings!
Free to play? Or busy with homework? Hang these colorful signs on your door so you can concentrate!