You and your classmates design 3-panel story sequence scenes about the same story, then compare how you designed them.
1.
Examine several picture books that have a clear story sequence (beginning, middle or climax and end). Observe how character's appearance, actions, and settings change throughout the story and are reflected in the illustrations.
2.
Read or listen to a new story or paragraph about an event. Use your imagination to decide how you can represent the sequence in three illustrations.
3.
Fold a large sheet of colored construction paper in thirds (or use three sheets of smaller paper).
4.
With Crayola® Scissors, cut story setting shapes and figures for all three parts of the story sequence from colored paper. Fill each of the three panels with shapes. Glue the shapes to the panels with Crayola Glue Sticks.
5.
Use Crayola Markers to add details to the story sequence.
6.
Share your work with the class and explain how you organized and designed your story sequence pictures. Compare and contrast classmates' sequence scenes of the same story.
What do you get when you combine Crayola® Dry-Erase Crayons and a plastic box frame? Hours of simple fun and learning!
Mix it up with word blends! Turn learning grammar into a game with a twist of your wrist.
Who likes plain vanilla ice cream? How about pecan mocha fudge? Or cotton candy? Create a 3-D classroom graph with Crayo
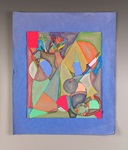
What's left in art when you take away anything that looks like something? Kandinsky did it---leaving color, line, shapes
Bring fairy tales to life! Spark creative book reports! Young readers track plot and characters with imaginative illustr
Drawing cartoons is a great way to encourage young writers and illustrators.
What's inside these Colorful Covers? A journal? E-mail addresses? Class notes? Photos? This book is great for cool-looki