Create a 3-D presentation of the landscape where you live, or landforms anywhere in the world. The foreground, middle ground, and background layers pop right out!
1.
Before you begin your art, find out about the landforms in the area you are learning about. Locate hills, lakes and rivers, valleys, wetlands, and other natural physical features. Check out several maps, including elevation maps, to see the physical features of the Earth’s surface.
2.
Notice what features are the farthest away in the scene—those will be the background. Clouds and mountains, for example, might be several miles away. Sketch the background on a full sheet of Crayola Neon Color Explosion® Paper with Neon Color Explosion Markers. You will fill them with interesting designs later.
3.
On another Neon Color Explosion Paper, decide what large features are in front of the background. Trees and streams might be your middle ground.
4.
On more Neon Color Explosion paper draw your foreground with Neon Color Explosion Markers. The things closest to you might be buildings or flowers.
5.
Now you are ready to color your three grounds with Neon Color Explosion Markers. Try different color combinations of the super bright colors! A neat way to create interesting textures in large spaces is to outline an object, a cloud for example, and then
6.
Cut out the sections, making sure their sizes overlap but do not cover each other. Place several layers of self-adhesive foam dots on top of each other. Attach them to the back of the middle and foreground pieces.
7.
Press the middle ground on top of the background so that it sticks out. Press the foreground on top of the middle ground. Stand back to see how your art really pops out at you! This kind of artwork is called a relief sculpture.
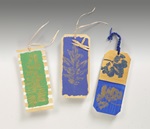
Bring nature's designs indoors with these golden leaf-printed bookmarks. For gifts, make matching picture frames, gift w
Celebrate nature with a bookmark! Collect fallen leaves to create a unique way to mark your page.
Create a notebook with nutritional information about fruits and veggies. Stay healthy, fit, and informed about your food
Capture nature's spirit by creating a leaf-print picture frame. Gold Crayola® Premier™ Tempera creates a dazzling gift t
Ready to peek inside an ordinary-looking rock? Your inside knowledge of gems and minerals becomes crystal clear with thi
Represent the spirit of hope with a classroom display of sunny daffodils. Plant flowering bulbs and learn how communitie
Wood to make pencils is harvested from forests. Discover how the pencils you use have an environmental impact—and why re
Volcanic eruptions invite exploration of the Earth’s interior. This colorful exhibit is perfect for a science fair proje